Creating a unique embroidery design has become increasingly important for businesses, apparel brands, creators, and hobbyists who want to stand out in a crowded market. Instead of relying on generic, mass-produced patterns, custom embroidery allows you to transform original artwork, logos, illustrations, and personalized concepts into high-value stitched creations.
However, many beginners quickly discover that custom embroidery isn’t as simple as uploading an image and pressing “start.” A standard JPEG or PNG file cannot be read directly by an embroidery machine because it must first go through a process called digitizing.
This guide serves as a complete blueprint, covering both the creative development of a custom embroidery pattern and the technical steps required to convert your ideas into professional-quality embroidery files ready for production.
Hand Embroidery vs. Machine Embroidery: Choosing Your Path
Before you begin designing for embroidery, it’s important to understand the difference between hand embroidery and machine embroidery, as each follows a unique design and production workflow.
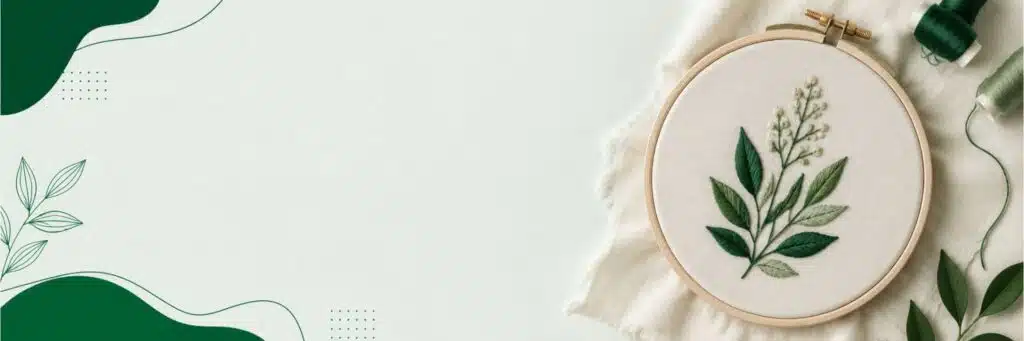
Hand embroidery is a traditional, manual process where designs are transferred onto fabric using tracing paper, carbon paper, transfer pens, or printable templates. Instead of digital files, embroiderers work from stitch guides and pattern outlines, manually creating each stitch. This method offers artistic flexibility and customization but requires significant time, patience, and skill.
Machine embroidery takes a more technical approach. An embroidery design must first be converted into a digital stitch file using embroidery digitizing software. The design is mapped with stitch paths, stitch nodes, densities, and thread sequences before being saved in machine-readable formats such as DST, PES, JEF, or EXP. These files allow embroidery machines to reproduce designs accurately and consistently across multiple products.
For businesses offering personalized merchandise through on-demand merchandise services, machine embroidery provides the scalability needed to fulfill orders efficiently while maintaining consistent quality.
Likewise, brands and organizations producing large apparel runs often rely on machine embroidery because it delivers repeatable results across hats, polos, jackets, and uniforms. This becomes especially important for companies managing bulk embroidery orders where consistency and production speed directly impact profitability.
Because most readers are interested in creating professional embroidery files for commercial use, the majority of this guide focuses on the digital side of embroidery creation—including artwork preparation, digitizing, stitch planning, and production-ready file formats. These skills are also essential for decorators offering contract decoration services to apparel brands, promotional product companies, and embroidery businesses.
Conceptualization & Artwork Preparation
Every successful embroidery project starts long before the first stitch is created. Whether you’re designing a company logo, custom artwork, or branded merchandise, proper artwork preparation is one of the most important steps in the embroidery workflow.
Choose Embroidery-Friendly Artwork
Not every graphic translates well into embroidery. Unlike digital printing, embroidery uses thread to recreate an image, which means certain design elements may become distorted or lose detail during stitching.
The best embroidery-ready artwork typically includes:
- Bold outlines and clean shapes
- Solid color areas instead of gradients
- Limited color palettes
- Readable text with adequate spacing
- Simple geometric elements
- High contrast between design components
Complex shadows, photographic details, and extremely thin lines often need to be adjusted before digitizing begins.
Simplify Complex Designs
Many logos and illustrations contain details that look great on a screen but become problematic when converted into stitches. One of the key principles of embroidery design is simplification.
To improve stitch quality:
- Remove unnecessary small details
- Combine tiny design elements
- Eliminate subtle gradients
- Increase line thickness where needed
- Simplify overlapping shapes
- Replace photo-realistic effects with solid fills
For businesses creating custom logos for uniforms, hats, or branded apparel, simplifying artwork often produces cleaner embroidery results and improves production efficiency.
Why Vector Graphics Matter
The file format you use can significantly impact embroidery quality. Many beginners start with PNG or JPEG images, but these raster formats are made of pixels. When enlarged, they often become blurry or develop jagged edges, making accurate digitizing difficult.
Vector formats such as:
- SVG
- EPS
- AI
- PDF (vector-based)
are preferred because they use mathematical paths rather than pixels. This allows artwork to scale infinitely without losing quality.
Clean vector artwork provides digitizers with precise outlines and shapes, making it easier to define stitch paths, densities, and thread directions. Starting with a high-quality vector file reduces editing time, improves embroidery accuracy, and helps create a more professional final product.
Understanding Embroidery Software Options
Choosing the right embroidery software is one of the most important decisions you’ll make when creating custom embroidery designs. The software determines how efficiently you can convert artwork into stitch files, edit designs, and prepare them for production.
Entry-Level & Free Software
If you’re just getting started, Ink/Stitch is one of the best free options available. Built as an open-source extension for Inkscape, it allows beginners to create basic embroidery files without investing in expensive software.
Benefits include:
- Free to use
- Open-source community support
- Basic digitizing capabilities
- Ideal for hobbyists and beginners
While powerful for a free tool, it has limitations when handling highly detailed or commercial embroidery projects.
Mid-Tier & Prosumer Software
As your skills and business grow, software like Embrilliance and Hatch Embroidery offer significantly more control and efficiency.
These platforms provide:
- Advanced editing tools
- Better stitch management
- Lettering and monogram features
- Improved auto-digitizing functions
- Professional-quality outputs
Many small embroidery businesses producing custom apparel, hats, and promotional products use these platforms to scale operations efficiently. Businesses creating branded merchandise and promotional products often find this software tier offers the best balance between cost and functionality.
Commercial & Professional Software
For large-scale production environments, Wilcom and Pulse remain industry standards.
Professional-grade platforms offer:
- Advanced manual digitizing
- Multi-head machine optimization
- Production workflow management
- Superior stitch control
- Enterprise-level efficiency
These systems are commonly used by commercial embroidery shops producing uniforms, large apparel orders, and custom embroidered patches for corporate and retail clients.
Auto-Digitizing vs. Manual Digitizing
Many embroidery programs advertise “one-click” auto-digitizing. While convenient, these tools often generate poor-quality stitch paths, excessive stitch counts, uneven densities, and thread breaks.
Professional digitizers rarely rely solely on automatic conversion. Instead, they manually define stitch directions, underlay, density, pull compensation, and sequencing to ensure clean, durable embroidery.
In short, auto-digitizing may help create a starting point, but manual digitizing remains essential for achieving professional-quality embroidery results.
The Step-by-Step Digitizing Process (The Core Blueprint)
Digitizing is where artwork transforms into machine-readable embroidery instructions. Unlike printing, embroidery machines cannot interpret images on their own. Every stitch, direction, density setting, and thread path must be intentionally programmed. Understanding this process is essential for creating professional embroidery designs that sew cleanly and efficiently.
Step 1: Set Up the Hoop Size & Fabric Profile
Before importing artwork, configure your embroidery software to match the real-world production environment.
Important settings include:
- Hoop dimensions
- Fabric type
- Stabilizer selection
- Thread type
- Machine specifications
For example, a design created for a 4″ × 4″ hoop may not fit a 5-panel cap frame or jacket back hoop. Likewise, embroidery on a polo shirt behaves differently than embroidery on canvas or twill because each fabric responds differently to needle penetration and thread tension.
Starting with the correct settings prevents production issues later.
Step 2: Import and Scale the Artwork
Next, import your vector artwork into the embroidery software.
When resizing:
- Maintain proper aspect ratios
- Avoid stretching the design
- Ensure text remains readable
- Verify minimum stitchable element sizes
A logo that looks perfect at 8 inches wide may become impossible to embroider cleanly when reduced to a 2-inch chest logo. Scaling decisions should always account for embroidery limitations rather than simply visual appearance.
Step 3: Create the Underlay Stitch
Underlay acts as the foundation of every embroidery design.
Its purpose is to:
- Stabilize fabric
- Prevent stitches from sinking into the material
- Improve coverage
- Increase design durability
- Support top stitching
Without proper underlay, embroidery can appear uneven, distorted, or lose detail. Most professional digitizers customize underlay settings based on fabric type, stitch style, and design complexity.
Think of underlay as the structural framework that supports the entire design.
Step 4: Map the Stitch Sequence (The Order of Operations)
One of the most important digitizing decisions involves determining the order in which the machine will sew.
Professional digitizers generally:
- Work from background to foreground
- Stitch larger areas before smaller details
- Minimize thread color changes
- Reduce unnecessary trims
- Limit jump stitches
For example, if a logo contains a large filled circle and a small text element on top, the fill area should be stitched first, followed by the lettering.
Efficient pathing reduces production time and improves finished quality.
Step 5: Apply the Correct Stitch Types
Different design elements require different stitch styles.
Satin Stitches
Best used for:
- Text
- Borders
- Narrow shapes
- Lettering
- Outlines
Satin stitches create a smooth, shiny appearance and provide excellent detail.
Fill (Tatami) Stitches
Best used for:
- Large color areas
- Background elements
- Solid shapes
- Logos with broad coverage
Tatami fills distribute stitches evenly while maintaining stability.
Running Stitches
Best used for:
- Fine details
- Delicate outlines
- Travel paths
- Small decorative accents
Running stitches use minimal thread and help connect different design sections efficiently.
Step 6: Set Stitch Directions (Angles)
Stitch direction has a significant impact on how embroidery looks.
Changing stitch angles affects:
- Light reflection
- Texture
- Dimension
- Visual separation
- Overall realism
For example, two adjacent fill sections using the same thread color can appear completely different simply by changing the stitch angle.
Common techniques include:
- Alternating fill directions
- Using opposing stitch angles
- Creating visual depth through directional changes
- Simulating shadows and highlights
Mastering stitch direction is often what separates beginner digitizing from professional-grade embroidery. Proper angles add texture, improve readability, and give designs a polished, dimensional appearance that stands out on finished garments.
Mastering Technical Physics: Push, Pull, and Compensation
Creating a professional custom embroidery design requires more than choosing stitch types and colors. Every embroiderer must understand the physical forces that occur when thread interacts with fabric. These forces directly affect how your final embroidery appears once stitched.
The Science of Thread Pull
During embroidery, thousands of needle penetrations occur as thread is sewn into the fabric. Each stitch places tension on the material, causing the fabric to stretch, compress, and shift slightly. This movement is unavoidable and becomes more noticeable on lightweight, stretchy, or unstable fabrics.
As a result, the finished embroidery often differs slightly from the digital artwork.
Understanding the Push and Pull Phenomenon
The most common embroidery distortion is known as push and pull.
- Pull: Stitched columns tend to become narrower than their original digital width.
- Push: Design elements often become slightly longer along the stitch direction.
For example, a perfectly round circle in a digital custom embroidery pattern may stitch out as a slightly oval shape if push and pull compensation is not applied correctly.
This effect becomes especially noticeable in:
- Small lettering
- Satin stitch columns
- Borders and outlines
- Geometric shapes
- Detailed logos
Applying Pull Compensation
To counteract distortion, digitizers intentionally modify the artwork before stitching.
Pull compensation involves:
- Slightly widening satin columns
- Expanding narrow design elements
- Adjusting borders and outlines
- Compensating for fabric movement
These modifications allow the embroidered design to stitch out at the intended dimensions rather than shrinking during production.
For anyone looking to create custom designs for embroidery, mastering pull compensation is one of the most important skills to develop. It separates amateur embroidery files from professional-grade production designs.
Many commercial embroidery providers and businesses offering contract embroidery services rely heavily on precise compensation settings to ensure logos, text, and branding elements remain accurate across different fabrics, garment types, and production runs.
Understanding push, pull, and compensation ultimately allows your embroidery to sew cleaner, sharper, and closer to the original design vision.
Exporting Your Design File Formats
After completing your custom embroidery design, the final step is exporting the file in the correct format for production. This stage is critical because embroidery machines cannot read standard graphic formats like JPG, PNG, or SVG directly. Instead, they require stitch-based embroidery files that contain needle paths, stitch types, thread colors, and sequencing instructions.
Working Files vs. Machine Files
When creating embroidery artwork, always save two versions:
- Working File – The editable source file used inside your embroidery software (such as .EMB, .EMX, or software-specific formats).
- Machine File – The production-ready embroidery file that your machine reads during stitching.
Keeping the original editable file allows you to resize, adjust stitch density, modify thread colors, and refine the embroidery pattern without starting from scratch.
Embroidery File Format Cheat Sheet
| 📁 File Format | 🧵 Common Machine Brand |
|---|---|
| .PES | Brother, Baby Lock |
| .DST | Tajima, Barudan, Ricoma (industry standard) |
| .EXP | Melco, Bernina |
| .HUS | Husqvarna Viking |
| .JEF | Janome |
| .VP3 | Husqvarna Viking & Pfaff |
| .XXX | Singer and selected commercial systems |
Best Practice Before Production
Before sending any digitized embroidery file to production:
- Run a stitch simulation.
- Verify hoop dimensions.
- Check thread color assignments.
- Confirm stitch count and density.
- Test-sew on a sample fabric.
Proper file export ensures your embroidered logo, patch, or artwork stitches exactly as intended and maintains the quality expected from a professional custom embroidery design workflow.
Troubleshooting Common Design Flaws Before Stitch-Out
Even the best custom embroidery design can encounter problems during production if the file isn’t properly digitized. Identifying and fixing these issues before running a stitch-out can save time, thread, fabric, and costly rework.
1. Thread Breaks and Bird-Nesting
One of the most common embroidery problems is thread breakage or bird-nesting (large thread tangles underneath the fabric).
Common causes:
- Excessive stitch density
- Too many overlapping stitch layers
- Poor stitch sequencing
- Missing lock stitches
Solution: Reduce stitch density, eliminate unnecessary overlaps, and add proper tie-in and tie-off stitches to secure thread paths.
2. Gaps Between Outlines and Fill Areas
If you notice visible spaces between satin borders and fill stitches, your design likely lacks adequate compensation settings.
Common causes:
- Insufficient pull compensation
- Incorrect stitch angles
- Fabric distortion during stitching
Solution: Adjust pull compensation values and test the design on the actual fabric type before production. This is especially important when creating a detailed custom embroidery pattern for garments that stretch or move.
3. Fabric Puckering and Distortion
Puckering occurs when the fabric wrinkles around the stitched area instead of remaining flat.
Common causes:
- Design density is too high
- Incorrect stabilizer choice
- Excessive tension settings
- Poor underlay construction
Solution: Use the correct backing material, reduce stitch density where possible, and strengthen underlay stitches to improve fabric stability.
4. Misaligned Details
Small text, borders, and intricate elements can shift during embroidery.
Solution: Simplify tiny details, increase stitch coverage, and always perform a sample stitch-out before final production. Proper testing ensures your embroidery file translates accurately from screen to fabric.
In the Nutshell
Creating a professional custom embroidery design is rarely a one-step process. The most successful embroidery projects follow an iterative workflow: digitize, test stitch, evaluate, adjust, and repeat. Even experienced digitizers rarely achieve a flawless result on the first attempt because fabric type, thread tension, stabilizers, and stitch density all influence the final outcome.
By understanding artwork preparation, stitch sequencing, pull compensation, and machine file formats, you can create cleaner and more durable embroidery designs. Whether you’re building a personal custom embroidery pattern or preparing large-scale production files, consistent testing and refinement remain the key to achieving high-quality embroidery results every time.
FAQs
1. What is the difference between artwork and an embroidery design?
Artwork is the original graphic file, while an embroidery design is a digitized file that contains stitch instructions for an embroidery machine. A logo must be digitized before it can be embroidered.
2. How long does it take to create a custom embroidery design?
Simple text-based designs may take 15–30 minutes to digitize, while detailed logos, patches, and complex artwork can require several hours of manual digitizing and testing.
3. Can every image be converted into embroidery?
Not always. Highly detailed photographs, gradients, and very small design elements often need to be simplified before they can be transformed into a high-quality embroidery design.
4. Why does my embroidered design look different from the digital preview?
Thread, fabric texture, stitch direction, and pull compensation can alter the final appearance. This is why test stitching is essential before full production.
5. What fabric works best for custom embroidery?
Stable fabrics such as cotton twill, canvas, denim, polos, caps, and jackets generally produce the best embroidery results because they provide strong support for stitch formation and minimize distortion.